경험 발표의 가치
컨퍼런스나 밋업의 발표는 세가지로 분류해 볼 수 있다.
-
첫번째로는 가장 먼저 떠오르는 기술 발표. 누군가는 어떤 프레임워크를 깊게 파봤다거나, 특정 기술을 한계까지 밀어붙여봤을 것이다. 아예 새로운 걸 만들었을 수도 있다. 이걸로 뭘 할 수 있고 어떻게 잘 쓸 수 있는지 얘기하는 것이 기술 발표의 핵심이다.
-
다음으로는 영감을 주는 발표도 있다. 기술적인 내용은 거의 없거나 비중이 낮지만 청중들에게 아이디어를 심어주고 새로운 시도를 해보게끔 독려를 한다. 또는 이미 하고 있던 것을 계속해서 하도록 동기 부여를 할 수 도 있다.
-
마지막으로 경험 발표가 있다. 경험 발표는 누구나 시도해볼 수 있다. 어떤 문제가 있었는데 이걸 어떻게 해결했다던지, 아니면 어떻게 개발을 시작하게 되었는지도 정말 좋은 경험 공유가 될 수 있다. 중요한 것은 경험을 통해 자신이 배운 점을 전달하는 것이다.
경험 발표가 값진 이유는 ‘과정’이 녹아있기 때문이다. 모든 사람은 유일무이하다. 같은 일도 각자만의 방식으로 경험하고 같은 지식도 다른 사고를 거쳐 습득한다. 따라서 발표자의 ‘배운 점’이 이미 알려져 있는 것일지라도 어떤 과정과 방식으로 그걸 배웠는가가 듣는 개발자들에게는 특별한 자산이 된다. 프로그래머인 우리는 매일 어려운 문제에 부딪히고 문제를 해결한다. 해답이 아니라 방법을 알고 있으면 처음보는 미래의 문제들도 해결할 능력을 갖추게 되는 것이다.
그래서 하고 싶은 말은,
꼭 iOS 개발자가 아니어도, 스위프트/오브젝티브-씨를 몰라도, 경력의 종류와 양과 상관없이, 그리고 개발자가 아니어도 좋습니다. 당신의 기술과 동력과 경험을 나눠주세요.
Tags: letswift, cfp, presentations
BookStore iOS 샘플 앱
아래 글은 BookStore-iOS 프로젝트의 소개 글의 한글 버전입니다.
앱 개요
이 샘플 앱은 IT Bookstore API를 사용하여 최신 프로그래밍 책을 검색해볼 수 있는 앱이다.
해당 프로젝트는 Result 타입 활용, 유닛 테스팅, UI 테스팅, 네트워크 stubbing, 프레임워크 분리, 문서화 주석(documentation comment) 작성 등의 예제를 포함하고 있다.
내용
Result타입- 유닛 테스트에서 네트워크 stubbing
- Mock 데이터로 UI 테스팅 하기
- 앱 로직을 프레임워크로 분리하기
- 문서화 주석 작성
- Implicitly Unwrapped Optional 제거하기
Result 타입
보통은 Result 인스턴스에서 Success나 Failure 값에 접근하고 싶을때 스위치문을 쓰게 된다.
switch result {
case .success(let response):
  //response 객체 사용
case .failure(let error):
  //에러 처리
}
하지만 스위치문은 너무 문법이 길고 불필요한 case까지 써줘야하는 단점이 있다. 그래서 success와 catch라는 익스텐션 메서드를 추가해서 Result 인스턴스 값을 접근하는 데에 사용하면 매우 용이하다.
searchResult.success { response in
  //response 객체 사용
}.catch { error in
  //에러 처리
}
혹은
result.success(handleSuccess)
      .catch(handleError)

func handleSuccess(_ result: SearchResult) { ... }
func handleError(_ error: Error) { ... }
유닛 테스트에서 네트워킹 Stubbing
테스트에서 실제 네트워킹을 하는 것은 바람직한 방식이 아니다. 유닛 테스트에 지나치게 불확실한 의존성이 생기기 때문이다. URLSession을 사용하고 있다면 URLProtocol의 서브클래스를 만들어서 stubbing을 할 수 있다.
1. URLProtocol 서브클래스 생성
2. MockURLProtocol을 URLSession에 연결
let config = URLSessionConfiguration.ephemeral
config.protocolClasses = [MockURLProtocol.self]

//해당 session으로 네트워크 요청을 수행
let session = URLSession(configuration: config)
4. 원래 쓰던 것처럼 URLSession 사용
session.dataTask(with: urlRequest) { (data, response, error) in
  //Mock 데이터가 전달됨
}.resume()
Mock 데이터로 UI 테스팅 하기
유닛 테스트에서 사용하는 위 방식은 UI 테스팅에서는 작동하지 않는다. 테스트 번들과 XCUIApplication이 돌아가는 앱 번들이 서로 다른 프로세스에서 실행되기 때문이다. Swifter라는 라이브러리를 쓰면 간단한 로컬 HTTP 서버를 시뮬레이터 내부에서 돌릴 수 있어서 앱 네트워킹을 localhost 서버로 보낼 수 있게 된다.
먼저 launchArguments로 값을 전달하여 UI 테스팅 중에만 host를 바꿔준다.
//XCTestCase 내부
override func setUp() {
  app = XCUIApplication()
  app.launchArguments = ["-uitesting"]
}

//AppDelegate의 application(_:didFinishLaunchingWithOptions:) 메서드 내부
if ProcessInfo.processInfo.arguments.contains("-uitesting") {
  BookStoreConfiguration.shared.setBaseURL(URL(string: "http://localhost:8080")!)
}
아래처럼 Swifter 서버 인스턴스에 mock 데이터를 세팅해준다.
let server = HttpServer()

func testNewBooksNormal() {
  do {
    let path = try TestUtil.path(for: normalResponseJSONFilename, in: type(of: self))
    server[newBooksPath] = shareFile(path)
    try server.start()
    app.launch()
  } catch {
    XCTAssert(false, "Swifter Server failed to start.")
  }

  XCTContext.runActivity(named: "Test Successful TableView Screen") { _ in
    XCTAssert(app.tables[tableViewIdentifier].waitForExistence(timeout: 3))
    XCTAssert(app.tables[tableViewIdentifier].cells.count > 0)
    XCTAssert(app.staticTexts["9781788476249"].exists)
    XCTAssert(app.staticTexts["$44.99"].exists)
  }
}
앱 로직을 프레임워크로 분리
앱의 기능 로직을 별도 타겟 프레임워크로 분리하면 여러 장점이 있다. 유닛 테스트의 기준이 명확히 분리되고 디펜던시에 대해 고려할 수 밖에 없게 된다. 반면에 프레임워크 로딩 때문에 앱 실행이 조금 느려질 수 있다.
BookStoreKit은 IT Bookstore API와 통신하여 도서 정보와 검색하는 기능을 책임지는 프레임워크이다. Networking은 URLSession을 기반으로 HTTP 통신과 응답 데이터 파싱을 간편하게 해주는 프레임워크이다.
문서화 주식 작성하기
스위프트 API 디자인 가이드라인에서는 모든 선언문에 문서화 주석을 달기를 추천하고 있고, 이해하기 쉬운 설명을 다는 행위만으로도 설계에 좋은 영향을 준다고 한다.
1. 열심히 작성
이 문서에서 마크업 문법을 참고하여 작성한다.
예)
2. 결과물을 확인/활용 한다.
Xcode 자동완성 기능

도움말 보기 기능 (option + click)

Implicitly Unwrapped Optional 제거하기
스위프트에서 !는 경고 표시이다. 크래시가 발생할 수 있는 가능성을 내포하는 코드이기 때문에 최대한 쓰지 않는 것이 좋다. 아래 두가지 방식으로 iOS 개발에서 종종 사용되는 IUO를 줄일 수 있다.
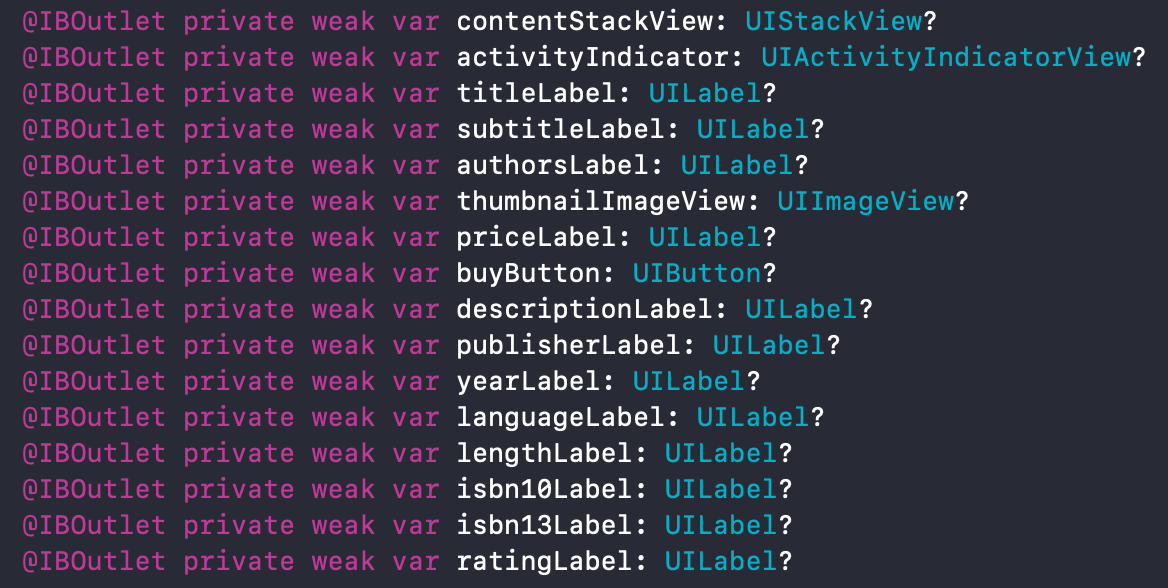
IBOutlet을 옵셔널로 바꾸기
스토리보드에서 뷰컨트롤러로 IBOutlet을 연결하면 기본적으로 IUO로 생성된다. 하지만 아울렛이 반드시 IUO일 이유는 전혀 없다. 보통 아울렛으로 연결된 뷰들은 값을 넣는 작업이 많기 때문에 옵셔널로 바꾸더라도 if let이나 guard가 생기지 않는다.
lazy 초기화 활용
UIViewController에 프로퍼티를 추가할때 종종 IUO를 사용한다. 뷰컨트롤러의 생성자를 오버라이딩해서 값을 넣어줄 수 없기 때문인데 이 경우에도 약간의 코드로 IUO를 없애줄 수 있다. unspecified라는 함수를 하나 만들어서 아래처럼 lazy var로 선언을 해주면 된다. 이렇게 하면 위험한 IUO나 언래핑하기 번거로운 옵셔널을 쓰지 않아도 된다.
lazy var bookStore: BookStoreService = unspecified()
Tags: ios, swift, unit testing, ui testing, network mocking, frameworks, optionals
SwiftFest Boston 2019 발표 및 참석 후기 - 컨퍼런스가 아닌 커뮤니티
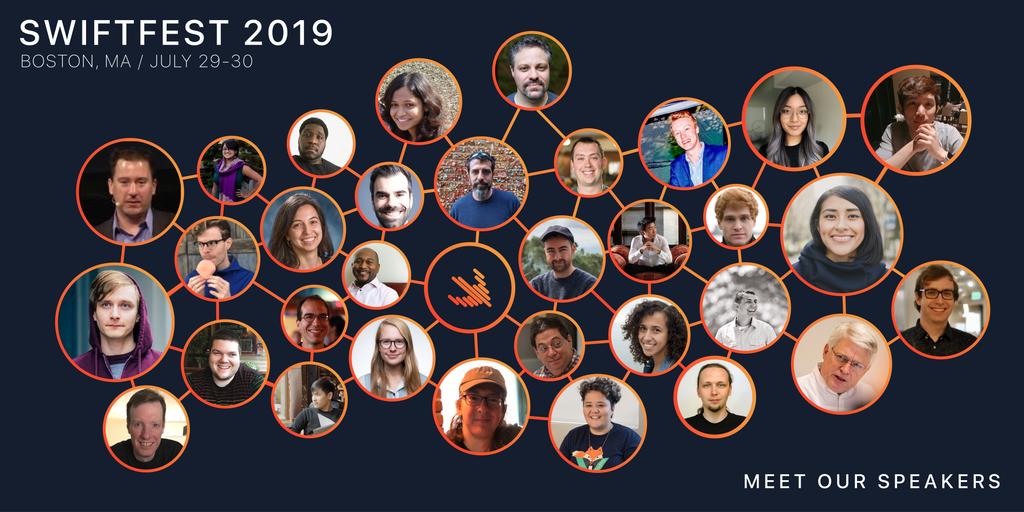
2019년 7월 29일~30일 이틀간 진행되는 SwiftFest라는 iOS 개발자 컨퍼런스에 스피커로 참여할 기회를 얻어서 보스턴을 다녀왔다. 단순히 영어 발표 경험 뿐 아니라 오래 기억에 남을 일들과 여러 잡다한 생각거리를 얻고 돌아왔다.
스피커로 선정되다
해외 컨퍼런스에서 발표를 해보고 싶어서 몇 달 전부터 준비를 했다. 무슨 주제로 어떤 컨퍼런스에서 발표를 할지를 정해야했다. 얼마 전 사이드 프로젝트로 개발한 Notable Me라는 앱을 출시했는데 거의 6개월간 삽질을 해가며 배운 것들을 발표 주제로 선정했고, #ARKit #CoreML #TuriCreate 등이 키워드라서 흥미를 끌 만 하다고 생각했다. 그리고서 스위프트 | iOS | 모바일 관련 컨퍼런스를 검색해봤는데 당연하게도 정말 다양한 나라에서 컨퍼런스들이 계획되어 있었다. 그 중 컨셉이 내 주제와 맞고 Call For Papers가 열려 있던 곳에는 거의 다 지원서를 냈다. 지원서는 구글 폼으로 받는 곳도 있었고 웹사이트에서 직접 입력하는 곳도 있었는데 대체적으로 주제와 내용을 필수로 써내야했다. 다만 얼만큼 자세하고 길게 써내야 하는지 정도의 차이는 있었다. 이미 한차례 사내 컨퍼런스인 네이버 엔지니어링 데이에서 발표를 한 적이 있어서 만들었던 자료를 토대로 내용을 채우는 것은 오래 걸리지 않았다. 모든 곳이 여행 경비 지원이 필요한지를 물었는데 뽑힐 확률을 조금이라도 높여주지 않을까 싶어 속으로 회사에서 지원해주기를 바라며 No로 답했고, 불러만 준다면 기필코 사비로라도 가겠다 생각했다. 그리고 과거 발표 영상을 첨부해야 하거나 심지어 필수로 요구하는 곳도 있었다. 그런 컨퍼런스들은 수백명 규모에 2~3일 동안 진행되고 참가비도 최소 30~50만원 정도 하는 곳들이었다. 마침 작년 레츠스위프트 발표 영상이 유튜브에 공개되어 있어서 첨부하여 지원할 수 있었다. 한국어로 발표한거지만 어차피 내용보다는 발표 모습이나 경험을 보고자 하는 것이겠거니 싶어 참고자료로는 문제없을 것이라 생각했고 발표자로 선정된 것을 보면 맞았던 것 같다.
스피커 선정은 발표 날짜가 정해진 것이 아니라 지원서를 왕창 제출하고서는 잊고 살았다. 사실 돌이켜보니 쿨하지 못하게 종종 웹사이트에 들어가서 혹시 다른 발표자들이 추가됐나 확인해봤다. 그러던 어느날 메일 하나를 받았다.
대입이던 취업이던 불합격 메일을 받아본 사람은 공감할 것이다. 메일을 여는 순간 죄송스럽게도나 unfortunately 같은 단어가 정말 도드라져 보인다. 지원을 하면서도 정말 선정이 될까 긴가민가하고 큰 기대를 하진 않았지만 막상 탈락 메일을 받으니 힘이 많이 빠졌다. 더욱 마음을 비웠다. 생각날 때마다 웹사이트에 들어가서 발표자가 추가됐나 확인하던 스토킹도 지쳐서 그만뒀다. 그러다가 어느 날, 출근 전 집에서 아침밥을 먹다가 메일함을 열어봤는데 보스턴에서 열리는 SwiftFest에서 발표해줬으면 좋겠다고 빠르게 확답을 달라는 메일이 와있었다.
정말 믿기지 않아서 두번 세번 다시 읽어봤다. SwiftFest는 이름에서도 알 수 있다시피 스위프트와 iOS에 집중된 컨퍼런스라서 해외 iOS 개발자가 많이 참석할 것이라는 점과 미국 동부로 가게 되는 것이 개인적으로 매우 좋았다. 아무튼 이렇게 흥분되는 메일을 받고서 부랴부랴 여권과 비자를 재발급받았다(6월 미국 출장 때 호텔 로비에서 백팩을 통째로 도난맞음ㅜ). 그리고 마침 네이버 테크콘서트에서 해당 주제로 한번 더 발표해달라고 요청을 받아 자료 업데이트도 하고 발표 경험도 더 쌓았다. 팀원분 왈, 발표는 사골과 같아서 하면 할수록 진국이 우러나죠 핵공감😆!
사람들을 만나다
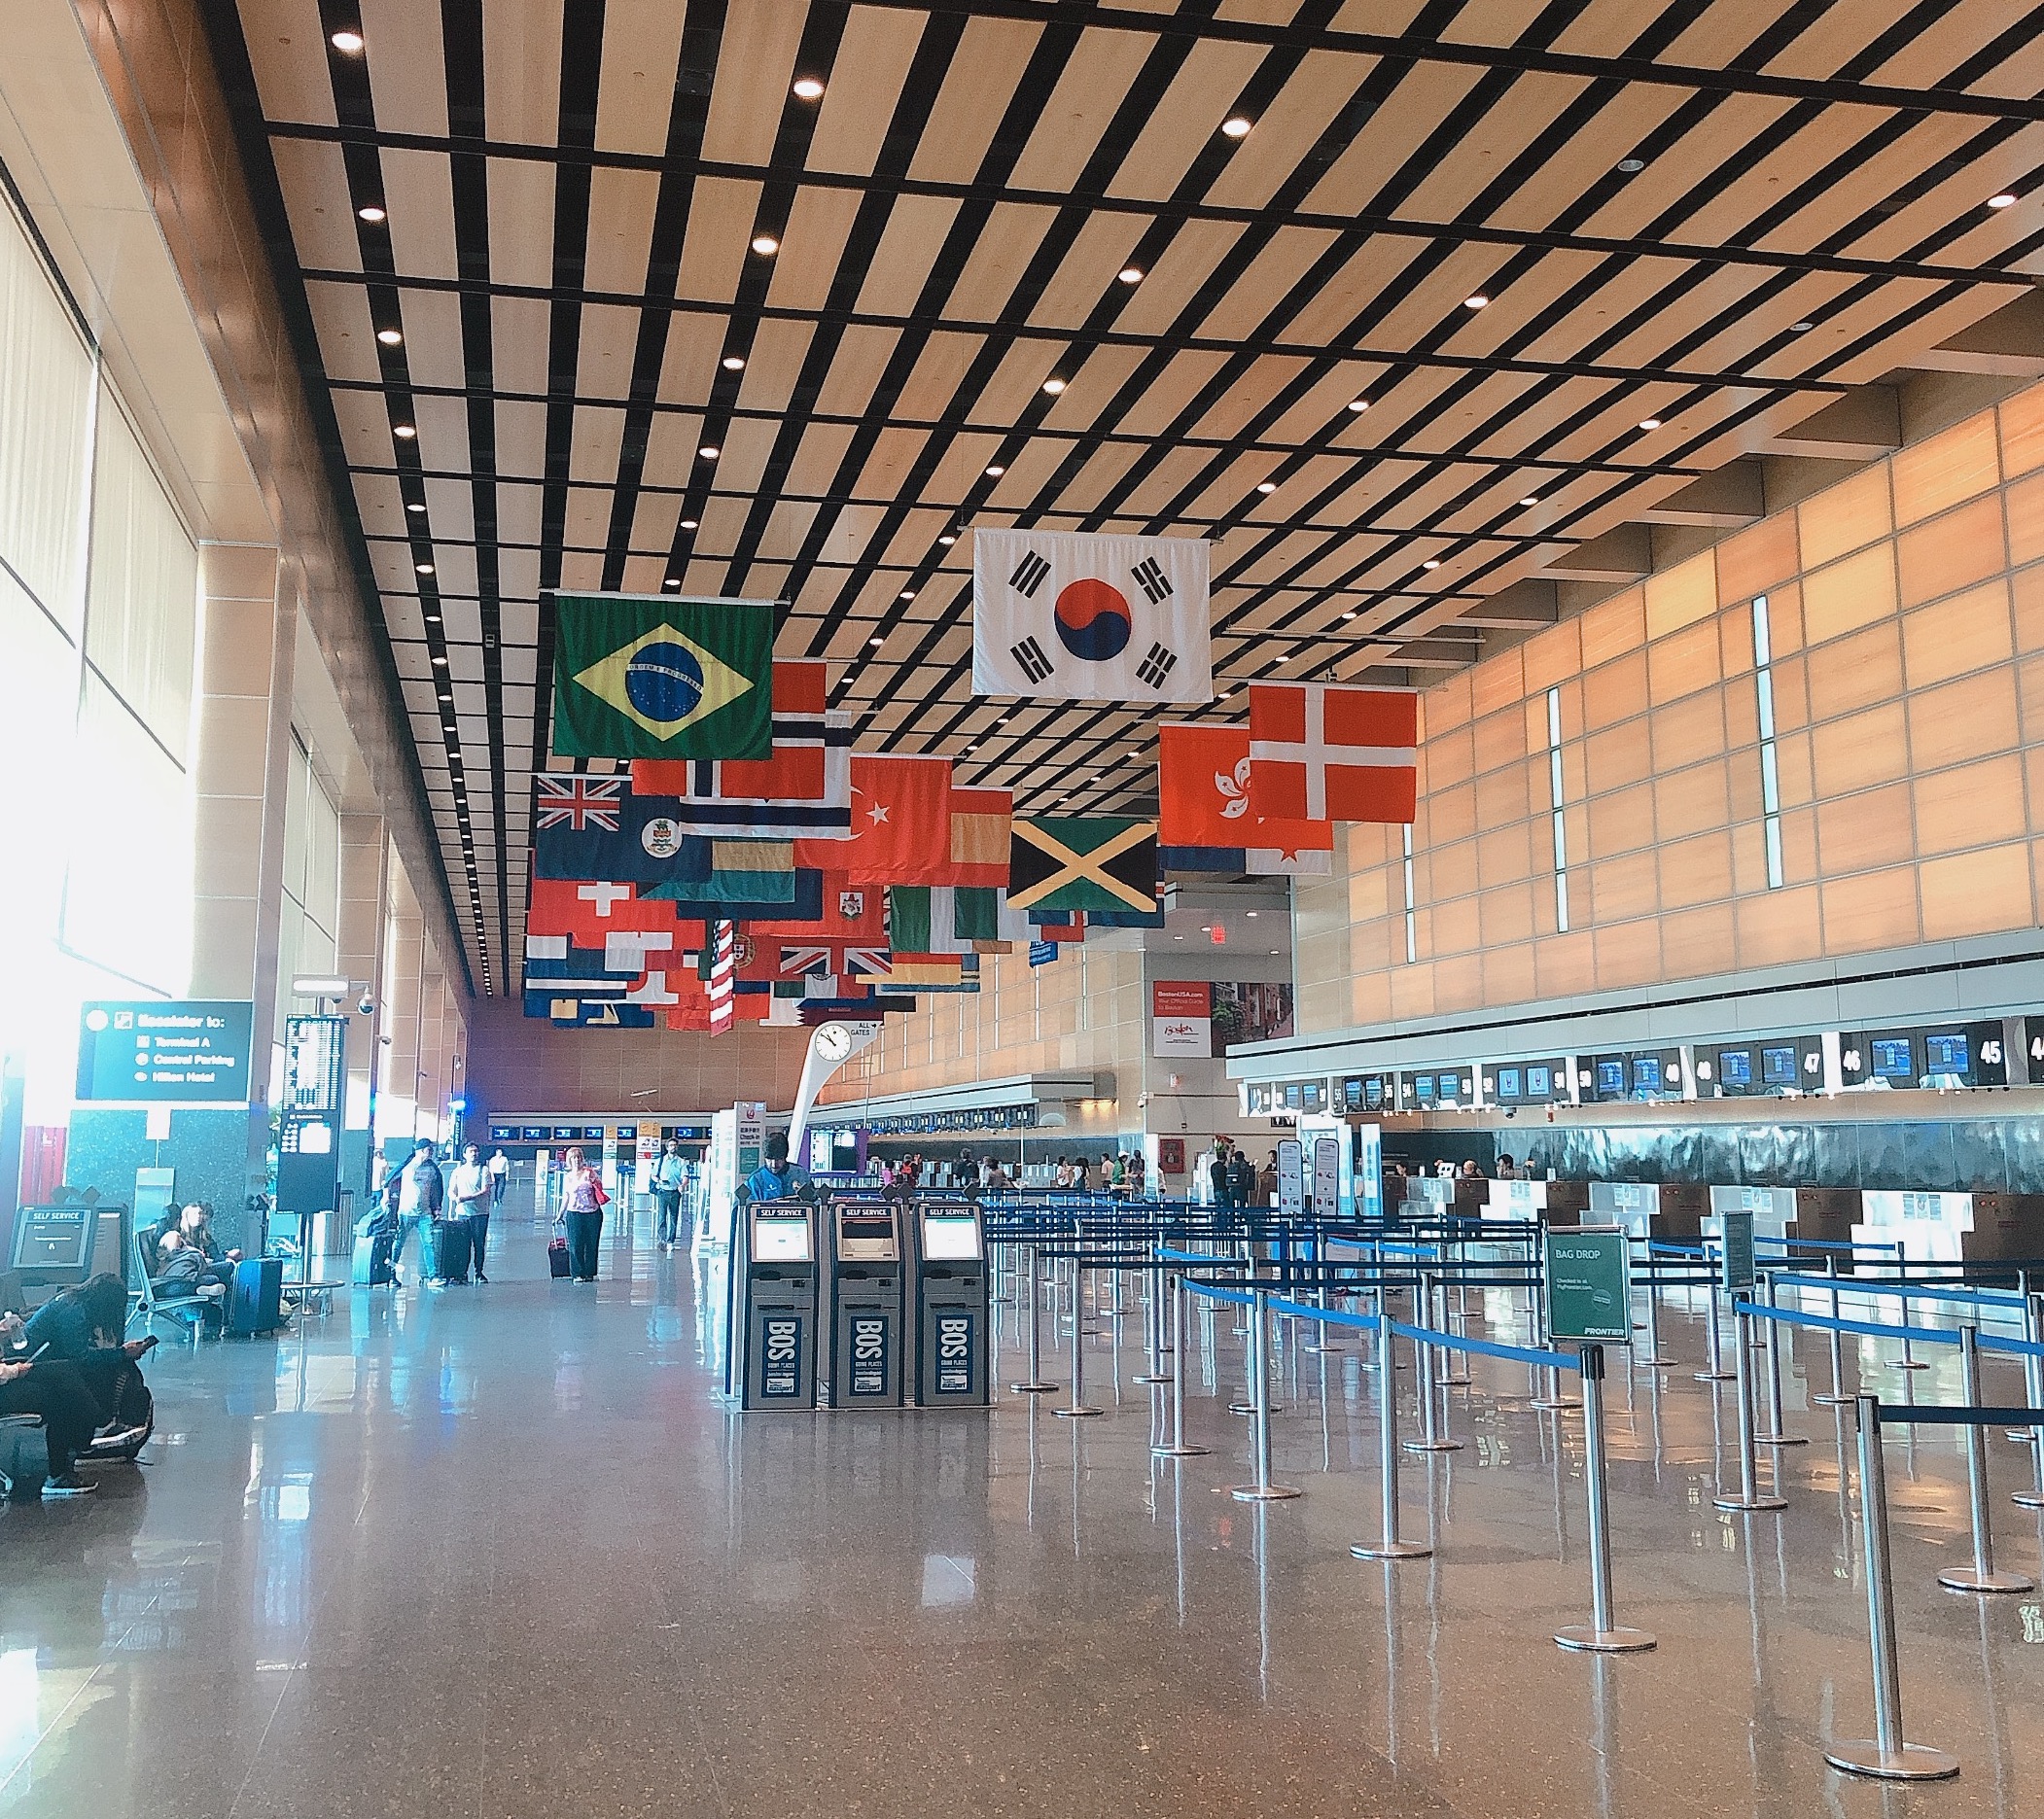
보스턴 로건 공항에 도착하니 태극기가 반겨주었다.
컨퍼런스가 월,화 이틀 동안 진행되는 일정이라 일요일 오후에 보스턴에 도착했다. 일요일 저녁에는 컨퍼런스장 근처 호텔에서 VIP 오프닝 디너가 열렸다. VIP 디너는 스피커, 자원봉사자, 스폰서사의 개발자들이 모이는 자리이다. 사실 네트워킹 보다는 장소가 호텔이라 스테이크 같은 코스 식사를 주는줄 알고 응원차 미국 중부에서 날라온 여자친구까지 꼬드겨서 같이 갔다. 그런데 예상을 완전히 뒤엎고 크래커와 치즈, 덤플링 같은 핑거푸드만 세팅되어 있었고 음료는 한잔만 공짜로 제공하는 형식이었다. 당황했지만 배가 많이 고팠기 때문에 조금이라도 배를 채우고 돌아가기로 했다. 그나마 몇 개 없던 테이블에 자리를 잡아서 먹고있는데 갓 대학 졸업한 것으로 보이는 어린 동양계 남자아이와 남미계의 여성이 합류하여 인사를 나눴다. 남자아이는 자신의 회사가 스폰서라서 초대받아 왔고 여성분은 캐나다에서 QA 엔지니어로 일하고 있다며 남편이 자원봉사자 총괄인데 사람이 부족하다고해서 도와주러왔다고 했다. 여자친구가 자원봉사에 관심을 보이니까 바로 남편을 부르더니 안그래도 몇 명 펑크나서 사람이 필요한데 내일 아침 일곱시반까지 나오라고 했다. (역시 미국 취업은 referral인가) 이렇게 예정에 없던 자원봉사 일을 얻고 돌아와서 나는 시차 적응을 위해 억지로 눈을 감았다.
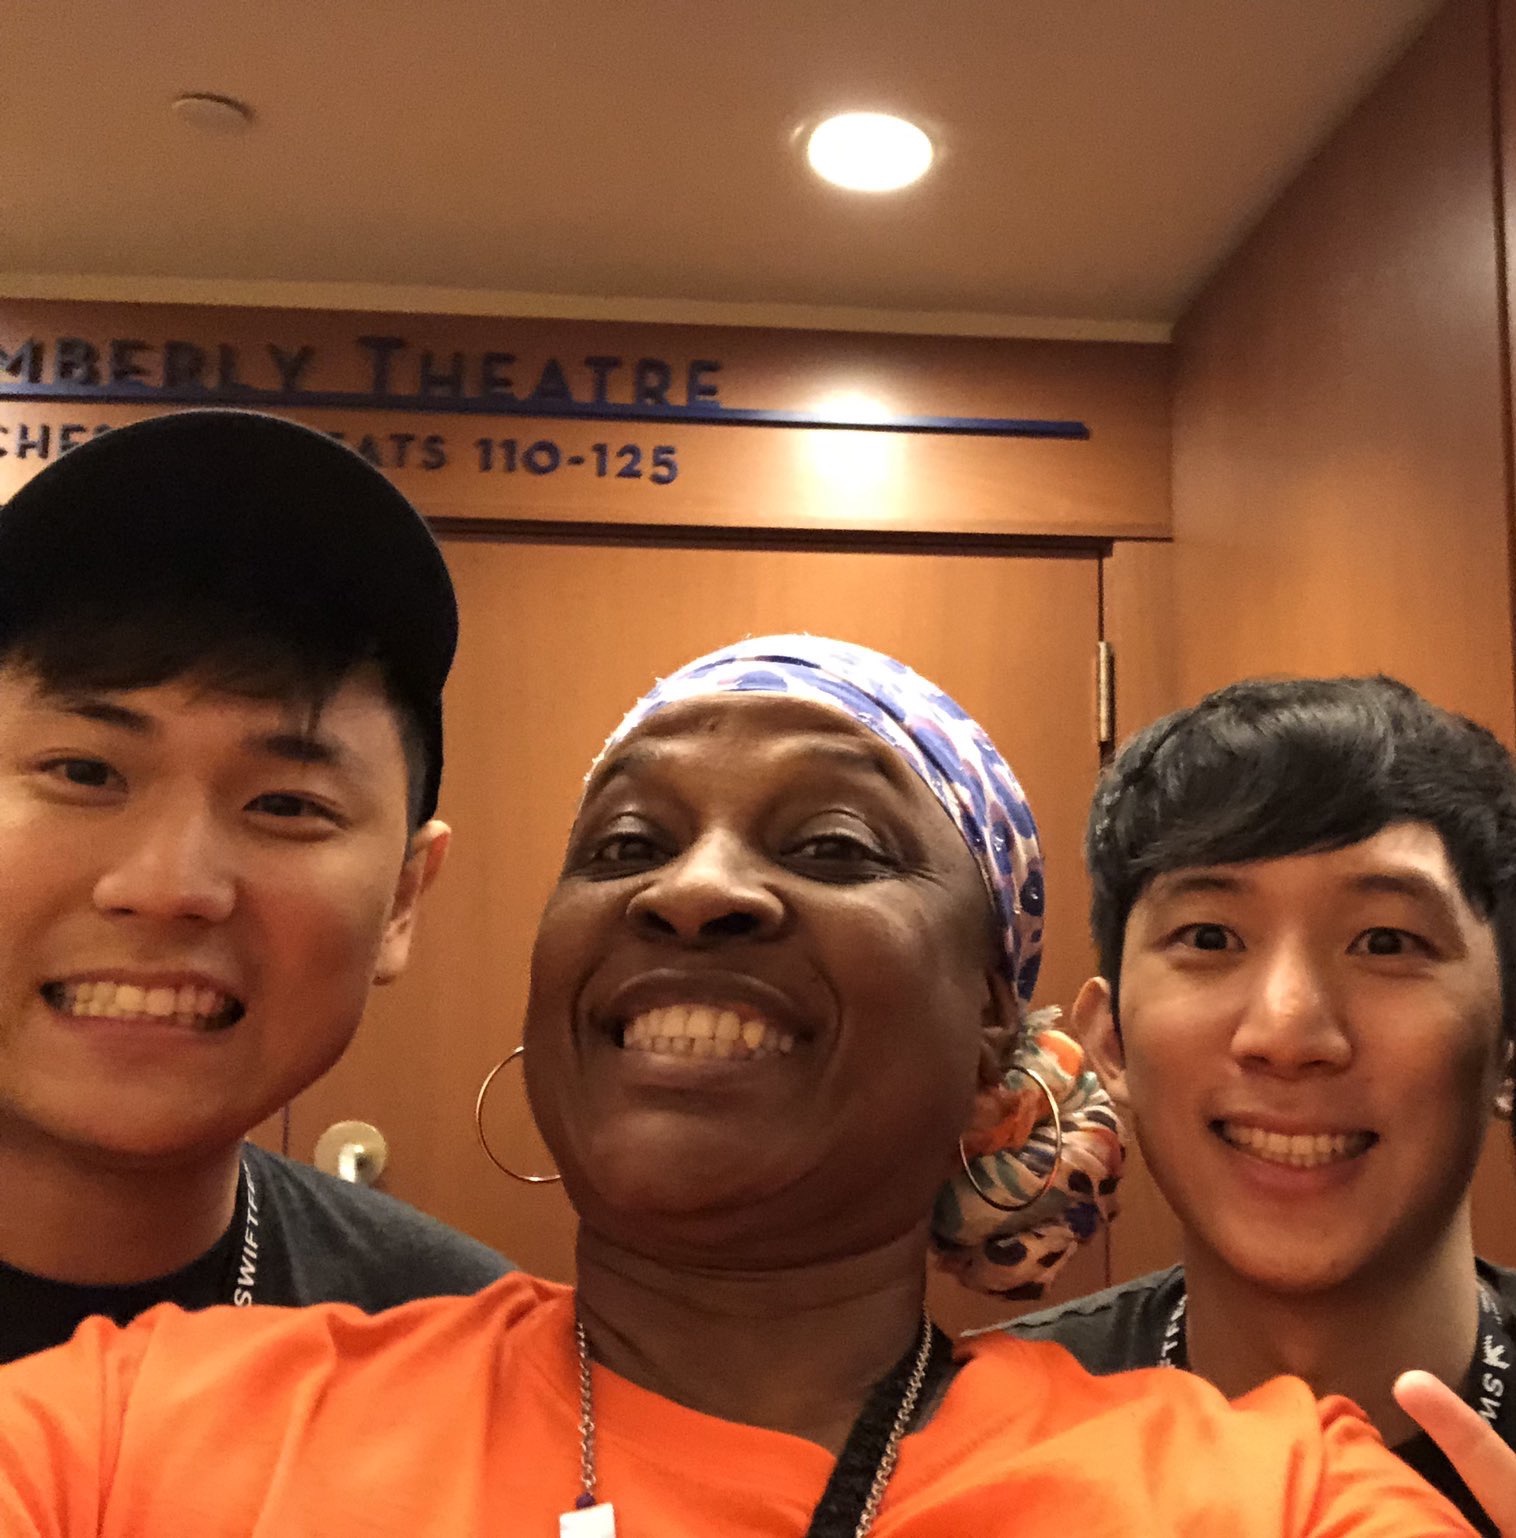
덕분에 여러 자원봉사자들과 친해질 수 있었다. 남편을 따라 자원봉사자로 왔다던 데니는 도미니카 공화국 출신으로 몬트리올에서 QA 엔지니어로 일하며 최근에는 파이썬과 스위프트를 공부하기 시작했다고 했다. 이틀 내내 프런트 데스크를 지키며 참가자들을 맞이하며 즐기는 모습이었다. 보스턴에 있는 한 회사에서 14년간 근무한, 베트남 출신 아내와 결혼한 마이클 아저씨는 너무 친절했고 로컬답게 차이나타운에 있는 매운 음식을 파는 식당을 알려주었다. 우리한테는 안맵겠지만 자기한테는 너무 매운데도 맛있어서 자주 간다는 말을 하는 모습이 귀여우셨다.

데니와 나
오거나이저이면서 연사면서 자원봉사자였던 앨리시아 카는 처음 만난 순간부터 격하게 반겨주었다. 한국인 친구가 있다면서 페이스북 친구를 꼭 맺자고 난리 법석을 피웠다. 처음엔 단순히 외국인에 관심 많은 사람이겠거니 했는데 앨리시아와 얘기를 나누고 컨퍼런스 내내 지켜보면서 커뮤니티에 다양성을 증대시키고 좋은 영향력을 미치는 사람이라는 걸 알게되어 점점 존경하게 되었다. 50대 흑인 개발자 여성은 미국 기준으로도 소수 중의 소수인데 더 대단한건 불과 몇 년 전 애플 스토어에 아이패드를 사러갔다가 유튜브로 개발을 배워서 앱을 출시한 고등학생 얘기를 듣고는 충격을 받아 회사를 그만두고 독학해서 iOS 개발자가 되었다고 한다.
앨리시아가 오프닝을 하면서 모두를 춤추게 만들어서 그런지 이틀 내내 컨퍼런스장 내부에는 들뜨고 신나는 바이브가 유지되었던 것 같다. 테크 업계의 Inclusion에 관한 키노트 중에는 업계에 여성 개발자가 너무 적다는 것에 동의를 하며, 여전히 차별과 편견이 만연하기 때문에 다같이 노력해야한다고 목소리를 높였다.
SwiftFest에서 만난 사람들 중 가장 인상깊었던 분은 로버트 C. 마틴(a.k.a. 엉클밥)이다. 내가 스피커로 선정될때만해도 리스트에 없었는데 몇 일 뒤에 웹사이트에 등장하셨다. 사실 직접 만나기 전까지는 그저 클린 코드의 저자, 업력이 엄청난 개발자 정도로만 생각하고 있었다. 그리고 멘토님이 사인을 받아달라고 부탁하셔서 어떻게든 붙잡고 사인을 받아야할 인물 정도로 생각했다. 엉클밥은 첫번째 날 마지막 시간에 클린 애자일을 주제로 키노트를 하게 되어있었다. 그래서 오후부터 찾아나섰다. 연사 대기실에도 기웃거려보고 컨퍼런스장을 돌아다녀 봤지만 찾지 못했고, 오거나이저인 Giorgio에게 물어보니 아직 도착하지 않았다고 했다. 하지만 키노트 시간이 되어가는데도 보이지 않아 정말 혹시나 낚인건가 싶기도 했다. 하지만 비행기가 연착되어 늦는 것이라는 소식을 들었다. 30분이 지난 후에야 도착하셨고 문 앞에서 기다리고 있었지만 황급히 들어가는 모습을 뒤에서 바라봤다.
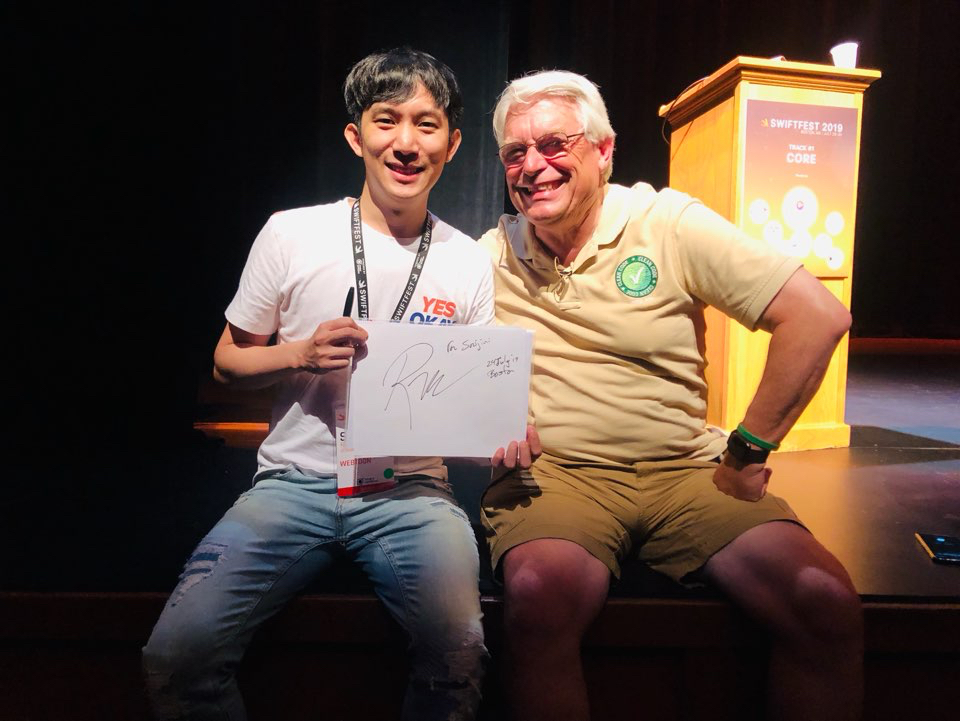
프사는 너무 카리스마 넘쳐서 날카롭고 매서운 할아버지일거라 생각했지만 완전히 틀렸다. 친절하고 재밌고 영감을 주는 분이셨다.
엉클밥은 클린 애자일을 주제로 프로그래머가 어떻게 소프트웨어를 개발해야 하는지에 대한 얘기를 했는데 시작 5분만에 유머와 친근함과 카리스마에 푹 빠져버렸다. 이제 소프트웨어 없이는 아무 것도 할 수 없는 세상이 되었다. 소프트웨어가 우리의 일상에 깊숙히, 구석구석 스며들었기 때문에 잘못 만들어진 소프트웨어는 엄청난 위험을 내포하고 있다. 사기를 치는데 활용되기도 하고 사람의 목숨을 앗아가기도 한다. 2015년 폭스바겐은 디젤게이트로 논란을 일으켰는데 주행 환경을 인지해 테스트 상황일때만 배기가스 저감장치를 작동시키는 조작 소프트웨어를 장착했던 것으로 밝혀졌다. 그리고 조작 소프트웨어를 직접 개발한 프로그래머도 유죄 선고를 받았다. 최근에는 보잉 737-Max 항공기가 5달 간격으로 두 번이나 추락해 346명이 죽었는데 소프트웨어 결함이 원인으로 밝혀졌다. 보잉사는 해당 기종의 생산을 중단하고 비행을 금지하는 초유의 조치를 가했다. 프로그래머는 자신이 만드는 소프트웨어에 책임감을 가져야한다. 소프트웨어의 결함 때문에 만 명 단위의 사람 목숨이 위태로워지는 사건이 가까운 미래에 벌어질 수도 있다. 따라서 높은 기준을 두고 결함없는 소프트웨어를 배포해야 한다. 어떻게 그렇게 할 수 있을까? 엉클밥은 클린 애자일을 주창한다.
애자일 방법론에 관해서는 엉클밥이 쓴 책에 더 자세히 나와있겠지만 나는 그 책을 읽지 않았기 때문에 발표 내용으로만 간략히 요약을 하자면,
- 소프트웨어는 매주 배포 가능해야한다.
- 배포 가능하다는 말은 테스트를 마쳐서 기능이 문제없이 돌아간다는 뜻이다.
- 따라서 테스트 자동화가 중요하다.
- 실제로 배포 할지 말지는 사업적인 기준으로 결정을 내린다.
- 스프린트는 1~2주 단위가 좋다. 이 기간 안에 뭔가 심각하게 잘못될 일은 없기 때문이다. 한달은 좀 길다.
- 생산성은 ’포인트’로 관리한다.
- 매 스프린트마다 포인트가 증가하는게 좋은건 아니다. 생산성이 올라간다는 의미가 절대 아니다. 일정하게 유지되는 것이 좋다.
- 포인트가 낮아지기 시작하면 코드가 썩어서(rot) 개발 속도가 저하되고 있다는 신호이다.
- 그러면 리팩토링을 해서 코드를 다시 깨끗하게 만들어야 한다.
- 리팩토링을 제대로/잘/자신있게 하려면 테스트가 정말 잘 짜여있어야 하고 코드는 반드시 테스트하고 배포해야한다.
한줄 요약을 하자면 테스트를 잘 짜고, 코드는 반드시 테스트를 거치고, 테스트 결과를 기준으로 리팩토링을 주기적으로 하여 생산성이 떨어지지 않게 해야 한다는 말이었다. 엉클밥은 TDD를 전파한다. 테스트를 통과하지 않은 코드를 배포하는 것은 말도 안된다고 한다. 그 외에도 인상 깊었던 말은 버그를 당연하게 생각하지 말라, 소프트웨어 테스트를 QA에게 떠넘기지 말고 자신의 코드는 본인이 책임지고 테스트해라 등이 있다. 머리가 하얗게 샌 분으로부터 이런 열정적인 발표를 들으니 후배(감히?) 프로그래머로서 어떤 마음가짐으로 코드를 짜고 소프트웨어를 만들고 배포할지에 대한 고민이 안 들 수가 없었다.
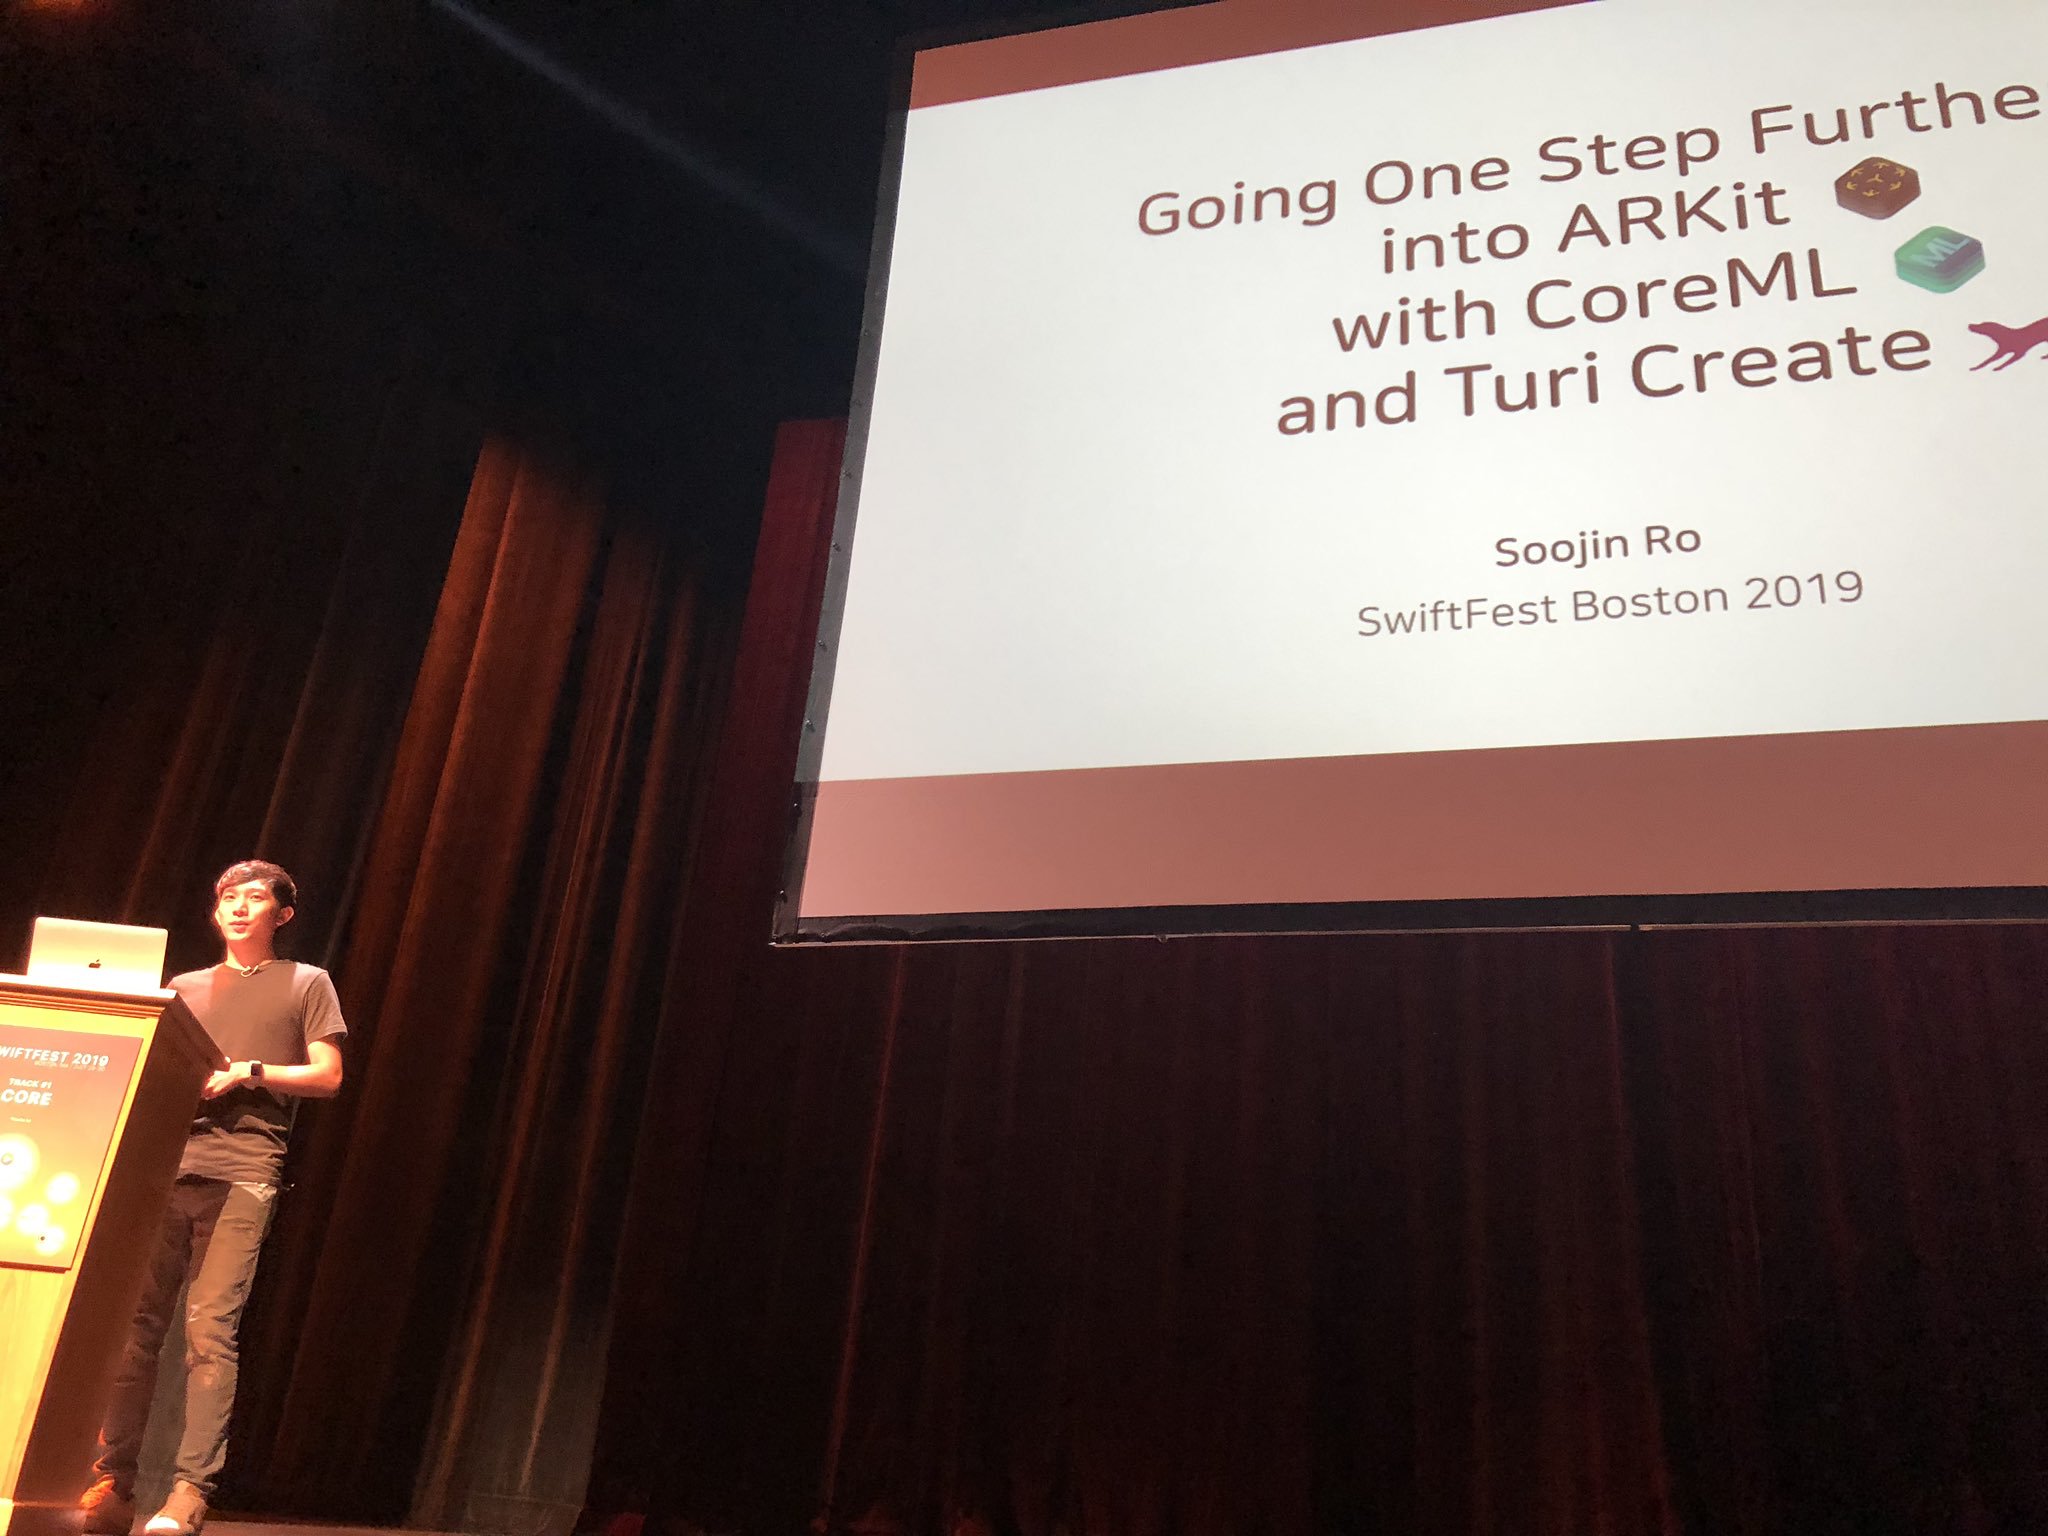
대망의 발표
발표는 무난히 마쳤다. 나보다 앞서 발표했던 분이 말이 굉장히 빠르고 청중을 빵빵 터뜨리셔서 갑자기 긴장이 되기도 했지만 단상에 올라가니 이미 친해진 사람들의 얼굴도 보이고 앱 데모 영상에서 예상보다 반응이 좋아서 긴장이 많이 풀렸다. 덕분에 차분하게 하고 싶은 말은 다하고 내려와서 아쉬운 점은 없다.
2015년 WWDC 가서 애플 뽕 + 개발자 뽕을 실컷 맞고는 ‘와 개발자하길 정말 잘했다’는 생각을 했었다. 개발자가 이런 일을 하는구나, 이런 변화를 가져오고 있구나, 앞으로 재밌는 일도 많고 여러 가능성이 열려있구나 싶었다. 그리고 이번 SwiftFest Boston에서 새로운 사람들(특히 엉클밥)을 만나고 색다른 경험을 하고나서는 ‘앞으로는 이런 마음가짐으로 프로그래밍을 하고 새로운 것을 경험해야겠다’는 생각을 하며 돌아왔다.
이 외에도 정말 재밌는 이야기를 들려준 연사분들, 내 발표가 끝난 후 스테이지 밑으로 찾아와 나에게 질문을 하셨던 분, 몇 달 전 내 블로그를 읽고 메일을 보낸적 있었던 학생, 대기실에서 인사를 나눈 틴더의 한국인 개발자 등등 좋은 사람들을 많이 만날 수 있었던 컨퍼런스였다.
커뮤니티에 참여하다
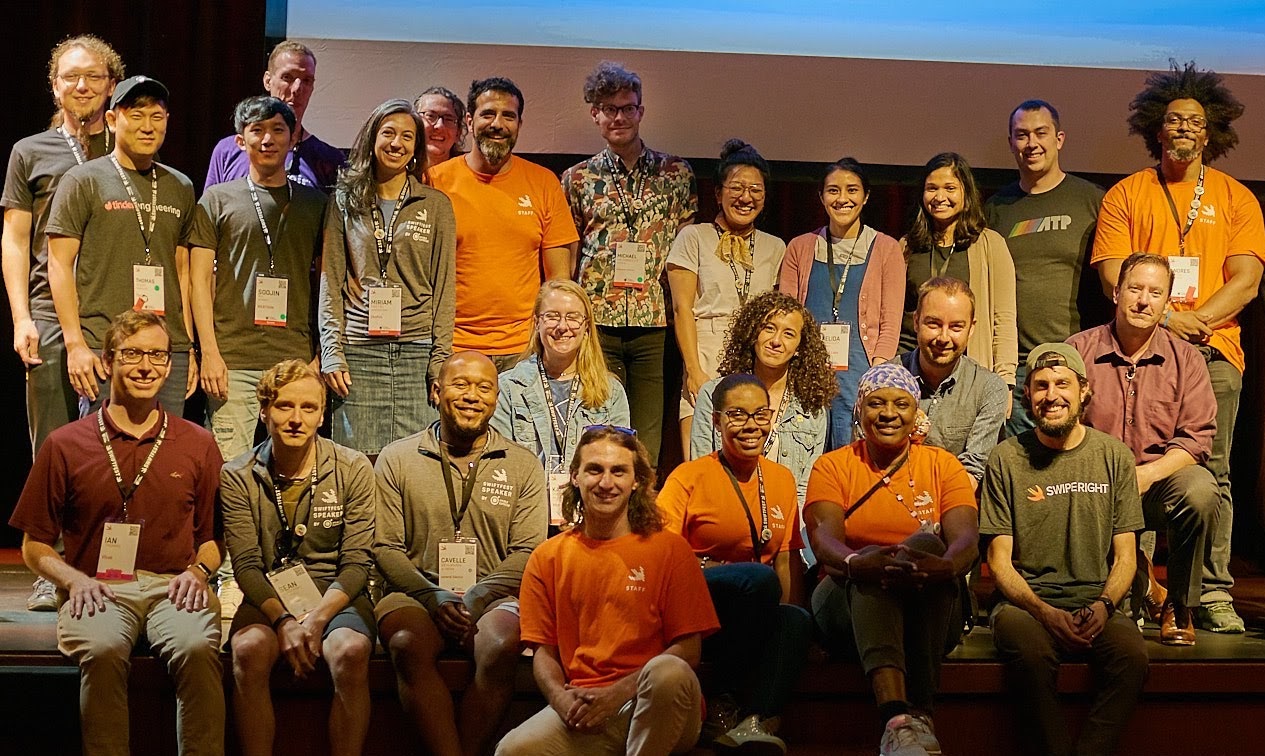
SwiftFest를 있게 해준 모든 사람들
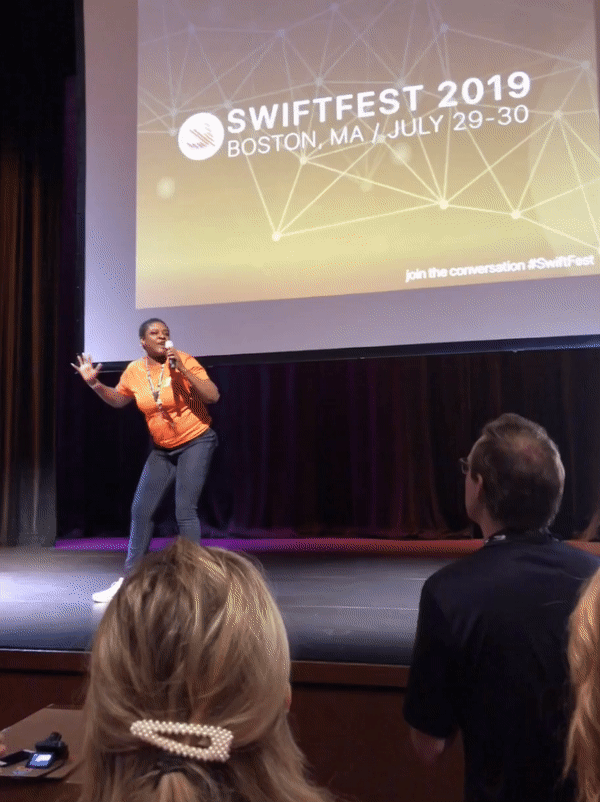
돌이켜보니 SwiftFest는 이틀짜리 컨퍼런스가 아니었다. 한 달 전 발표자 슬랙에 초대 됐을 때부터 마지막날 일정까지, 그리고 이후까지 컨퍼런스 참여자들은 새로운 사람을 만나고 새로운 아이디어를 얻고 대화를 하기 위해 오는 것이었다. 컨퍼런스도 이런 목적에 부합하도록 설계되고 진행되었다.
발표자로 선정된 후 웹사이트에 게재할 간략한 자기 소개와 소셜미디어 링크를 요청받았다. 이미 사이트에 올라가 있던 발표자들의 프로필을 둘러봤는데 개개인의 트위터와 링크드인 프로필 링크가 있던 것이 놀라웠다. 트위터 계정이 없던 나는 링크드인 프로필만 게재를 했다. 그래도 궁금해서 발표자들과 컨퍼런스 공식 트위터 계정을 구경 가보니 이미 컨퍼런스에 대해 얘기를 나누고 있었다. 공식적인 만남이 시작되기 전부터 사실상 온라인에서는 컨퍼런스가 시작한것이나 다름 없는 것처럼 보였다. 그래서 나도 트위터 계정을 만들어서 발표자들 팔로우도 하고 SwiftFest 해시태그를 써서 트윗을 해봤다. 컨퍼런스 전부터 발표자들의 링크드인과 소셜계정을 알게되니 발표자에 대해 미리 알아 볼수 있어서 좋았다. 발표에 대한 기대감도 커졌다. 평소 활동이나 관심사를 알아보고나서 컨퍼런스 당일에 만나면 둘 다 관심있는 주제로 대화를 할수도 있을 것이다. 그리고 컨퍼런스가 끝난 후에도 인상 깊었던 발표자의 활동을 계속 지켜볼수도 있고 원하면 대화를 할 수 도 있다. 반면 우리나라 컨퍼런스는 웹사이트에서 발표자의 소셜 계정이나 블로그, 브런치 등의 링크를 제공하는 곳이 거의 없다. 발표자보다는 발표 내용에 초점이 있는 것이 아닐까 싶다. 발표 주제가 흥미있으면 발표자의 업적이나, 커리어에 대해서 더 알고 싶어지기 마련인데 이런 점은 예전부터 아쉬웠던 점이다.
첫날 오프닝을 맡은 MC는 몇 년 전 컨퍼런스에서 만났던 인연으로 지금 회사로 이직을 했고 SwiftFest의 오거나이저와도 친분을 쌓아 이번에 자신의 회사가 공식 스폰서를 맡게 되어 기쁘다고 했다. 그러면서 이 자리에 있는 누군가가 당신의 인생을 바꿀지 모르니 사람들을 만나고 좋은 시간을 보내라고 당부했다. 일요일 저녁에는 VIP 오프닝 디너, 월요일 저녁에는 오후 7시반부터 크루즈 네트워킹 파티, 화요일 오후 5시부터 8시까지 라운지에서 캐주얼한 모임을 했다. 매일 네트워킹 시간과 장소를 제공했다. 그런데 꼭 네트워킹 시간이 아니더라도 세션이 진행될 때도 컨퍼런스장 곳곳에서, 스폰서 부스 앞에서 사람들끼리 대화를 하고 서로를 소개하는 모습을 봤다.
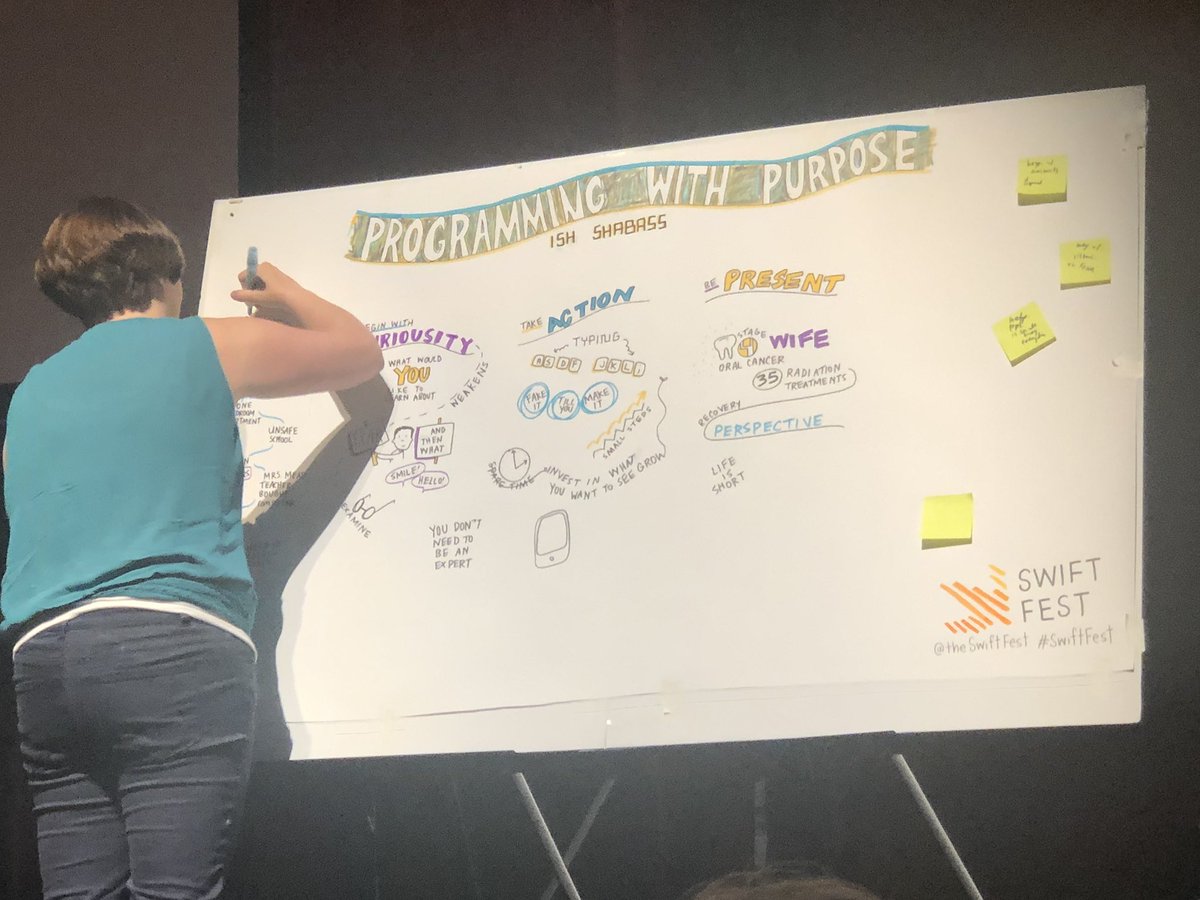
키노트 발표는 이런식으로 한 분이 무대 위에서 실시간으로 그림을 그려가며 요약을 했다. 처음보는 광경이어서 이걸 뭐라고 불러야할지 모르겠지만 흥미로웠다.
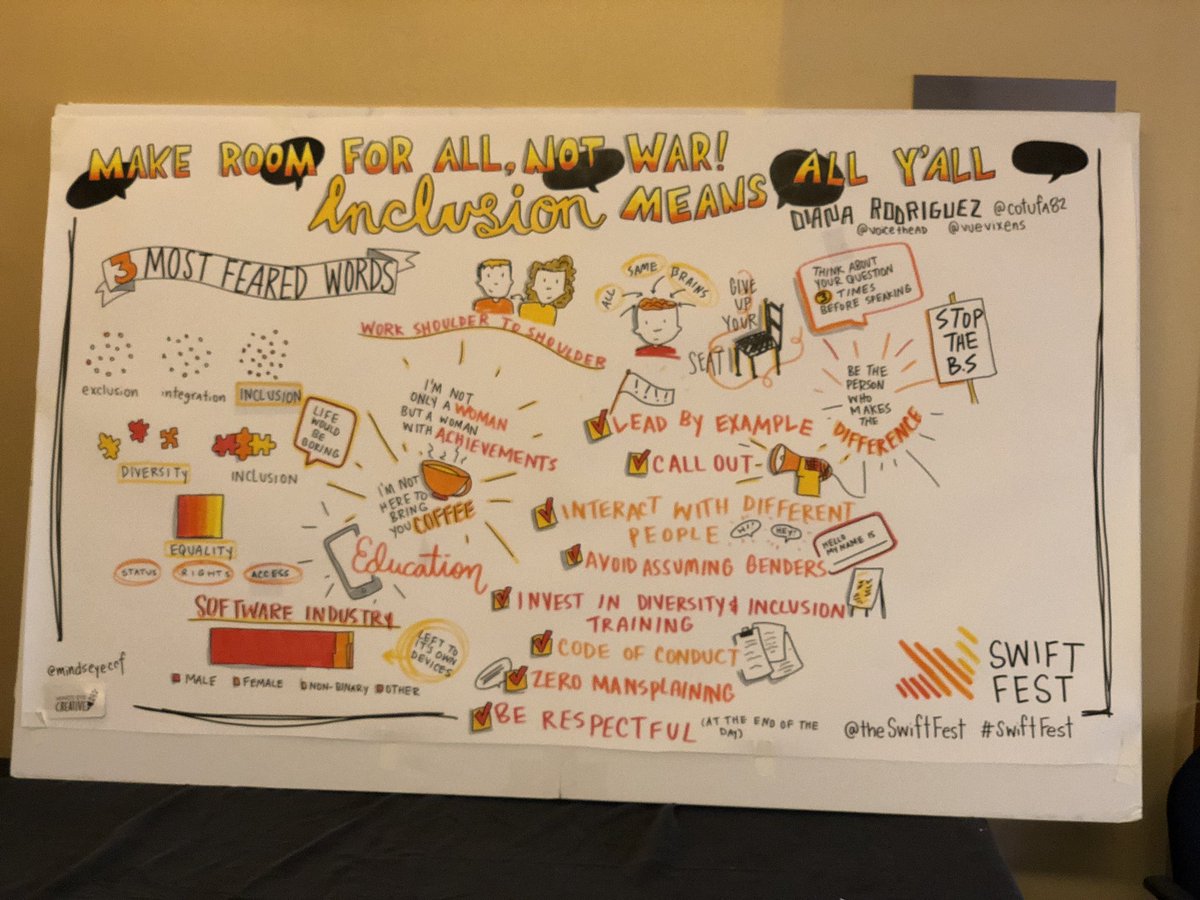
기술적인 내용이 아닌 흥미로운 키노트들을 통해서도 컨퍼런스가 일방적으로 발표를 듣는게 아니라 커뮤니티 모임이라는 인상을 받았고 소속감 마저 들게 했다. 첫날 오프닝 키노트는 Ish Shabazz가 맡았는데 Programming with Purpose라는 주제로 자신의 인생 얘기를 했다. 중학생 시절 자신이 컴퓨터에 관심을 보이자 선생님이 사비로 애플 II 컴퓨터를 사오셔서 사용법을 가르쳐주셨는데 이 순간이 인생을 바꾸는 순간이었다고 고백했다. Ish가 프로그래밍하는 목적은 매일매일 사소한 방법으로 남을 돕기 위해서라고 한다. 두번째 키노트는 위에 자세히 쓴 엉클밥의 클린 애자일이었다. 그리고 둘째날 오프닝 키노트는 Make room for all, not war!: Inclusion means all y’all 란 제목으로 Diana Rodriguez가 발표했다. 테크 업계가 더욱 다양성을 넓히고 소수자들을 포용해야 한다는 내용이었다. 많은 사람들의 예상과는 다르게 여성, 소수자들이 느끼는 차별과 편견은 최근에도 딱히 나아지지 않았고 새로운 세대 개발자들의 진입을 가로막는 요인이 된다고 했다. 이런 키노트를 통해서 커뮤니티 구성원의 인간적인 이야기를 듣고, 소프트웨어의 퀄리티나 다양성 이슈와 같이 더 크고 어려운 문제에 대해 모여서 얘기를 나누는 모습이 처음에는 생소했다. 키노트 후 트위터에서 한 참석자가 Diana에게 다음달에 자신이 주최하는 모임에서도 키노트를 해줄 수 있냐고 요청하고 기꺼이 가겠다고 하는 모습을 보며 이런 식으로 컨퍼런스를 통해 사람들 사이에 다양한 아이디어가 퍼지는거구나 싶었다. 그리고 공감하는 사람들이 많아질수록 서서히 변화를 가져올 것이다.
컨퍼런스를 구경한게 아니고 커뮤니티에 속하게 되었다.
국내에서 참석해봤던 컨퍼런스들과는 분위기가 달랐다. 여러 날에 걸쳐 진행한다던지, 참가비가 몇 십 만원이라던지 하는 겉으로 드러나는 규모적인 측면 만을 얘기하는게 아니다. 행사 주최자, 스폰서, 자원봉사자, 참가자, 발표자 이렇게 각 역할의 사람들이 명확히 구분되어 누구는 행사를 계획하는 공급자고 누구는 돈을 지불하여 서비스를 받고 이런게 아니라 모두가 함께 즐기는 페스티벌의 느낌이 강했다. 미국에는 포트럭Potluck 파티(네이버 사전)가 매우 흔하다. 파티를 여는 사람이 자신의 집으로 지인들을 초대하되 초대 받은 사람들이 각자 음식이나 술을 가져와서 다같이 나눠먹는 것이다. SwiftFest는 모두가 기여하고 함께 누리는 포트럭 파티 같은 컨퍼런스였다.
이 글의 초안을 읽어준 조소현, 안성용에게 고마움을 전합니다.
Tags: SwiftFest, speaking, Swift, conference, UncleBob, Boston
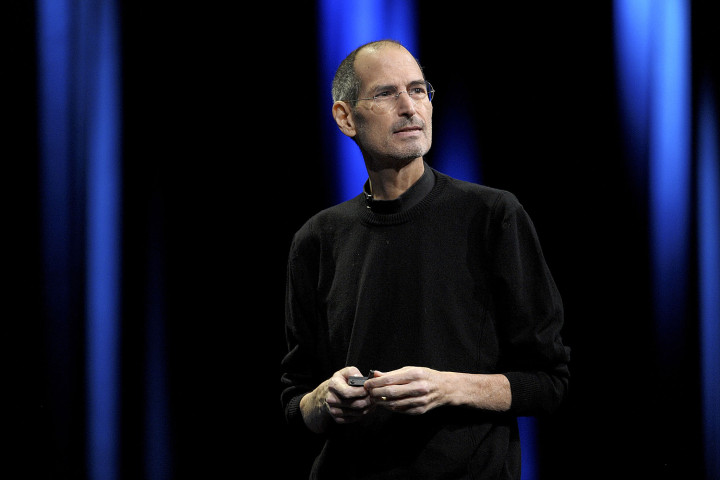
스티브 잡스 생전 마지막 인터뷰 어록 @D8 Conference 2010
2010년 5월에 열렸던 All Things Digital: D8 컨퍼런스에서 월트 모스버그(Walt Mossberg)와 카라 스위셔(Kara Swisher)가 100분 가량 스티브 잡스와 했던 인터뷰에서 발췌한 내용입니다. (유튜브 영상)
내 피가 무지개색이기 때문이다
“Because I bleed in six colors”
이 말은 스티브 잡스가 직접 한 말은 아니고, 애플 직원이 잡스가 던진 질문에 대한 답으로 한 말이다. 애플에서 쫓겨났던 잡스는 12년 만인 1997년 다시 CEO로 복귀한다. 하지만 애플의 상황은 그의 예상보다 훨씬 좋지 않았고 파산까지 약 90일이 남은 상태였다고 한다. 그러나 그는 아이맥, 맥북, 아이팟, 아이폰, 아이패드 등을 성공시키며 사망 직전이었던 애플을 세계 최고의 기업으로 일궈낸다. 그리고 인터뷰 바로 몇일 전 애플의 시가총액이 사상 처음으로 마이크로소프트를 넘어선다. 카라 스위셔는 이에 대한 소감을 묻는 것으로 인터뷰를 시작한다.
“우리 업계에 오래있었던 사람이라면 공감하겠지만, 정말 꿈만 같은 일이다. 하지만 상관 없다. 중요한 것이 아니다. 시가총액은 우리가 아침에 눈을 떠서 회사에 오게 하는 이유도 아니고 고객이 우리 제품을 사는 이유는 더더욱 아니다.”
원문 보기
For those of us that have been in the industry long time, it’s surreal. But it doesn’t matter very much. It’s not what’s important. It’s not, you know, what makes you come to work in the morning. And it’s not why any of our customers buy our products.
애플로 복귀한 잡스는 애플의 상태가 생각보다 더 심각하다는 것을 깨닫는다. 하지만 그를 놀라게 한 것은 그게 다가 아니었다. 당연히 떠났을 거라 여겼던 뛰어난 사람들이 아직도 애플에 남아있었다. 기적과 같은 상황에서 잡스는 ‘대체 당신이 왜 아직도 여기 남아있는건가요?’ 라고 물었다.
“내 피가 무지개색이기 때문이다. 이 회사가 퍼뜨리고 싶어하는 가치를 사랑한다. 그래서 우리는 그 가치를 지키기 위해서 지금까지 힘들게 일할 수 있었다.”
원문 보기
They said ‘Because I bleed in six colors, which was the cold six-colored Apple logo. And that was code for ‘Because I love what this place stands for’. And that just made all of us want to work that much harder to have it survived, have that value survived and bring it back.
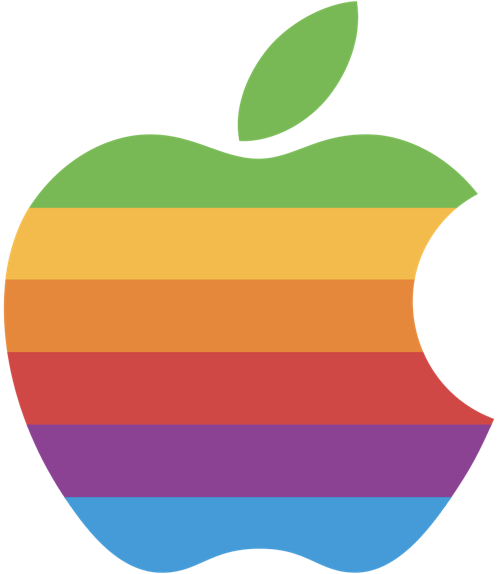
(초창기 애플의 6색 로고)
어떤 말을 타야 미래로 빨리 갈 수 있을 것인지 기술적인 관점에서 잘 선택해야한다.
“Choosing what horses to ride, technically”
잡스는 2010년 4월, Flash에 대하여(Thoughts on Flash)라는 공개 서한을 썼다. 얼마 전부터 애플은 아이팟, 아이폰, 아이패드에서 더이상 플래시를 지원하지 않기 시작했고 이 때문에 플래시의 개발사인 어도비는 연일 언론에서 애플을 비판하고 있던 터였다. 참다못한 잡스는 이 공개 서한에서 왜 플래시를 버려야했는지, 왜 이 결정이 애플 플랫폼의 개발자들과 소비자들에게 좋은 결정인지 설명한다. 모스버그는 잡스가 공개 서한에 쓴 말이 다 맞다 하더라도 이런 급작스러운 결정이 과연 소비자에게도 득이 되는 일인지 반문한다. 다음은 잡스의 답변이다.
“애플은 그 어느 회사와 마찬가지로 이 세상의 모든 자원을 가지고 있지 않다. 이런 상황에서 우리는 기술적인 관점에서 어떤 말을 탈지 신중하게 선택했고 그로 인해 성공을 거뒀다. 기술은 각자의 삶의 주기가 있다. 우리는 태동기에 있는 기술을 선택한다. 그러면 정말 많은 시간을 아낄수 있다. 그 아낀 시간으로 유망한 기술이 우리 제품에서 끝내주게 작동할 수 있게 만들 수 있다. 너무 많은걸 넣으려다보면 그저그런 제품 밖엔 안된다. 애플은 여지껏 그래왔다. 지구상에서 처음으로 5인치 플로피 디스켓을 3.5인치로 교체했다. 소니가 발명하긴 했지만 우리가 처음으로 상용화했다. 1998년에 출시한 아이맥 1세대에서는 플로피 디스크를 아예 제거해버렸다. 직렬, 병렬 포트도 없앴다. 인텔이 발명한 USB도 우리가 아이맥에 처음으로 도입했다. 맥북에어에서는 옵티컬 드라이브(CD)를 제거 했다. 우리는 지금까지 많은 것들을 제거해 왔고, 그럴때마다 미쳤다는 소리를 들었다. 선택을 내려야할 때가 있다. 더 멀리 가기 위해 올바른 말로 갈아타야할 때가 온다. 우리가 보기에 플래시는 지는 별이었다. HTML5가 태동하고 있었다. 플래시를 지원하려면 너무 많은 노력이 들어가야했다.”
원문 보기
Apple is a company that doesn't have the resources of everybody in the World. The way we've succeeded is by choosing what horses to ride really carefully, technically. We try to look for these technical vectors that have a future, and that are headed up. Different pieces of technology go in cycles. they have their springs, summer, and autumns, then they go to the graveyard of technology. So we try to pick things that are in their springs. If you choose wisely, you can save yourself an enormous amount of work versus trying to do everything. And you can really put energy into making those new merging technology be great on your platform, rather than just okay because you're spreading yourself too thin. So we have a history of doing that. As an example, we went from the five inch floppy disk to the 3 1/2 inch floppy disk with the mac. We were the first to do that. we made the 3 1/2 inch disk popular. Sony invented it, and we put it first in the products. We got rid of the floppy disk altogether in 1998 with the first iMac. We also got rid of serial and parallel ports. We were first to adopt USB even though Intel had invented it. You first saw it in mass on iMacs. And so, we have gotten rid of things. We were one of the first to get rid of optical drives, with the MacBook Air. I think things are moving in that direction as well. And sometimes when we get rid of things like the floppy disk drive on the original iMac people call us crazy. But sometimes you have to pick the things that look like they are gonna be the right horses to ride going forward. and Flash looks like a technology that had its day but it's really on its waning, and HTML5 looks like the technology that's really on the ascendency right now. And to incorporate Flash into the system is a lot of work, there's no smartphone shipping with Flash on it now as you know. ... But more importantly, HTML5 is starting to emerge.
그럼에도 모스버그는 이런 파격적인 결정의 대가가 소비자들에게 전가되어 불편함을 초래하고 선택권을 제한하는 것이지 않느냐는 질문으로 집요하게 파고 든다. 웹의 많은 컨텐츠와 수많은 화려한 사이트들이 플래시로 제작되어 있기 때문에 이런 사이트를 이용하는 사용자들은 어떡하냐는 정당한 지적이었다. 이에 잡스는 10초 간 곰곰이 생각을 한 후 다음과 같은 답변을 한다.
제품은 우리가 강조하고 싶은 것들의 모음집이다.
“Things are packages of emphasis”
“제품에서 어떤 기능은 굉장히 강조되어 있다. 어떤 기능은 별로 쓸만하지 않다. 심지어 아예 들어가지 않은 기능들도 있다. 서로 다른 사람들은 제각각의 선택을 하면서 살아간다. 만약 많은 사람들이 우리가 잘못된 결정을 내렸다고 말한다면 우리는 시장의 목소리를 존중한다. 우리도 그냥 회사를 운영하는 사람일 뿐이다. 단지 고객들을 위해 최고의 제품을 만들고 싶을 뿐이다. 그래도 우린 최소한 ‘이러이러한 것들은 최고의 제품에 어울리지 않는다’고 말할 정도의 용기와 신념이 있는 것이다. 일부 사람들은 이런 결정을 좋아하지 않을 수도 있다. 특정 회사의 이익에 반하는 결정일 수도 있다. 하지만 우리는 최고의 제품을 만들기 위해서 그 정도 비난과 논란을 받아드릴 준비가 되어있다. 우리는 시간과 노력을 올바른 기술에 투자해야한다. 고객들은 그런 결정을 우리에게 위임하기 위해 우리의 제품을 사고 우리에게 기꺼이 돈을 지불하는 것이다. 우리가 성공하면 우리의 제품은 잘 팔릴 것이고, 실패하면 안 팔릴 것이다. 그렇게해서 모든 것들은 균형을 찾아간다. 지금까지의 결과를 보건데 사람들은 아이패드를 매우 좋아하는 것 같다. 출시 이후 3초에 1대씩 팔리고 있다.”
원문 보기
Things are packages of emphasis. Some things are emphasized in a product, some things are not done as well in a product, some things are chosen not to be done at all at a product. And so different people make different choices. If the market tells us we're making the wrong choices, we listen to the market. We're just people running this company. We're trying to make great products for people. We have at least the courage of our conviction to say we don't think this is part of what makes a great product and we're going to leave it out. Some people are not gonna like that, some people are gonna call us names, it's not gonna be in certain company's best of interest but we're going to take the heat because we want to make the best product in the world for customers! We're gonna instead focus our energy on these technology which we think are on their ascendencies and we think we're gonna be the right technology for the customers, and you know what? They're paying us to make those choices. That's what a lot of customers pay us to do. If we succeed, they'll buy them! If we don't, they won't. And it will all work itself out. So far I have to say, people seem to be liking iPads! We've sold one every three seconds since we launched it.
애플의 제품을 오랫동안 써보면서 느끼는 것은 빼는 것의 중요성이다. 애플에 대한 높은 충성심은 고객을 위해 어려운 결정을 잘 내려주고 있다는 믿음에 기반한 게 아닐까 싶다. 애플이 아이폰에서 3.5mm 이어폰 잭을 빼버렸을 때도 정말 많은 논란이 있었고 조롱도 받았다. 불과 3년도 안 된 지금 길거리에 나가보면 유선 이어폰을 끼고 있는 사람은 찾아보기 어렵다. 꼭 에어팟이 아니더라도 각종 무선 이어폰이 유선 이어폰의 자리를 점령했다.
기능을 빼는 것은 추가하는 것보다 최소 수 배, 수십 배는 어렵다. 왜냐? 욕 먹을 각오를 해야하니까. 기능을 잘못 빼면 욕만 엄청 먹고 다시 되돌려야하고, 기능을 잘 빼도 처음에는 욕을 약간 먹고 시간이 지나야 잠잠해 진다. 잡스 말처럼 비난을 감수하려면 결정에 대한 믿음이 있어야 한다. 그런 믿음이 없는 사람이나 조직이 굳이 욕먹을 각오를 하고 기능을 빼는 행동을 할 이유가 없다. 일반적인 회사에서는 기능을 추가하고 그 기능의 사용자가 많거나 매출을 일으키면 그 기능을 만든 사람들이 성과를 인정 받는다. 하지만 기능이 누적될수록 서비스는 비대해지고 사용성은 복잡해진다. 새로 들어온 사용자는 오랜 시간 축적된 기능 더미 속에서 헤매게 된다. 며칠 전 대화를 나눴던 개발자 지인 한명은 대규모 코드 리팩토링을 하거나 메이저 기능을 개발하게 될때면 일부 작은 기능을 슬쩍 뺀다는 것이다. 누군가는 안좋게 생각할수도 있겠다. 하지만 누군가는 해야하지만 아무도 하지 않는 어려운 일을 지인이 하고 있다고 생각한다. 기능을 추가하는 것만큼이나 빼는 것을 중요하게 여기고, 훨씬 어렵고 위험한 일임에도 그 필요성을 느끼는 팀이나 회사가 있다면 그런 곳에서 정말 일해보고 싶다.
삶은 영원하지 않다
“Life is fragile”
잡스는 2003년 췌장암 선고를 받았다. 그나마 수술을 통한 치료 가능성이 있는 희귀한 종류의 췌장암으로 판명이 되고, 종양을 제거하는 수술을 한다. 그 후 2005년 스탠포드 졸업식 연설에서 잡스는 암이 완치됐다고 밝혔지만 2008년 암은 재발하고 2011년 세상을 떠난다. 인터뷰에서도 정말 많이 야윈 잡스의 모습을 볼 수 있다. 정식 인터뷰가 끝나고 공개 질의 세션에서 한 남성이 질문했다. 스탠포드 졸업식에서 연설을 하고 몇 년이 지났는데 혹시 덧붙이고 싶은 것이 생겼느냐고.
“음.. 잘 모르겠다. 아마도 그때 했던 말을 한번 더 강조하고 싶다. 왜냐면 지난 몇 년 간 난 인간의 삶이 영원하지 않다는 걸 더욱 뼈저리게 느꼈기 때문이다.”
원문 보기
“Oh I have no idea. I have no idea. Probably I would just turn up the volume on it because last few years have reminded me that life is fragile.”
Tags: Steve Jobs, All Things Digital D8, interview